Showing posts with label Sewing. Show all posts

Sunday, October 11, 2015

Featherweight Skill Series - Gathering Foot

Thank you for coming to my Featherweight Skill Series! There are thousands of us who love our little 221s but need or want a little more "know-how" on using them to their fullest potential. I hope my posts and videos will help you get more know-how and confidence in using your beautiful Featherweight. Enjoy the classes!

Class #8 - Gathering Foot

Class supply list:
Your fully threaded sewing machine with the Gathering Foot, several practice pieces of fabric: 6" squares (or rectangular strips) of different types of lightweight fabric.

Let's get sewing!

Friday, September 25, 2015

Featherweight Skill Series - Adjustable Hemmer

Thank you for coming to my Featherweight Skill Series! There are thousands of us who love our little 221s but need or want a little more "know-how" on using them to their fullest potential. I hope my posts and videos will help you get more know-how and confidence in using your beautiful Featherweight. Enjoy the classes!

Class #7 - Adjustable Hemmer 


Class supply list:
Your fully threaded sewing machine, the Adjustable Hemmer, two or three practice strips of fabric cut on the grain line: 5" X WOF (width of fabric) 

Let's get sewing!

Friday, September 18, 2015

Featherweight Skill Series - Foot Hemmer Part 2

Thank you for coming to my Featherweight Skill Series! There are thousands of us who love our little 221s but need or want a little more "know-how" on using them to their fullest potential. I hope my posts and videos will help you get more know-how and confidence in using your beautiful Featherweight. Enjoy the classes!

Class #6 - Foot Hemmer Part 2


Class supply list:
Your fully threaded sewing machine, the Foot Hemmer, two or three practice strips of fabric, ric rac or another type of edging. I set my stitch length at 8.

Let's get sewing!

Friday, September 11, 2015

Featherweight Skill Series - Foot Hemmer

Thank you for coming to my Featherweight Skill Series! There are thousands of us who love our little 221s but need or want a little more "know-how" on using them to their fullest potential. I hope my posts and videos will help you get more know-how and confidence in using your beautiful Featherweight. Enjoy the classes!

Class #5 -  Foot Hemmer
(I have extras. If you do not have this foot, let me know and I'll sell you one.)

Class supply list:
Your fully threaded sewing machine, the hemmer foot, at least two or three practice strips that are WOF X 4" wide, of a light or medium weight fabric, appropriate needle, and pressure setting. (See lesson 4: Needles, Fabric, Pressure Control)

Let's get sewing!

Wednesday, July 29, 2015

More Bow Ties

This time, I was asked if I could make a bow tie for a Yorkie Terrier that will be in a wedding. 

Hmmm. I hope I get a picture of this!

After given a tie to use for the collar, here's what I came up with. 

My Yorkie was the perfect sized model!


Have an idea for dressing up your pup? I can help you!
In light of the tragic, senseless hunting of majestic animals, let's remember that they have feelings too. 

Sunday, July 19, 2015

When you have fabulous fabric...


What can you do with it?

Make bow ties!


These were made for a wedding party this summer. They were a pleasure to see come together!

If you want custom pieces for your formal event, let me know and we'll get it done!

Sunday, November 2, 2014

A Quick Side Project - An Amp Cover

My DH asked me to make a cover for his amp. The piece of fabric I had was almost the exact size I needed! Love that when it happens! Here it is-


I used a canvas and think it will keep the dust off but be breathable enough to keep it aired. He was happy! So was I!

Sunday, March 9, 2014

Stash Control - the Quiltville Way

The ever mounting stash of scraps in ThistleFire, my sewing room, has been something I've wanted to get under control. Almost a year ago, Bonnie Hunter was in my area and I went to her presentation. She shared her way to tame the scrap pile. Her plan has been mulling in my mind and today I decided to start getting it organized.

Here's what w I was dealing with. The pile on the table wasn't too bad. It was the big bin that I can't keep adding to. It was time to end the mess!

If you haven't seen Bonnie's scrap control procedures, you can find them in the tips tab on her Quiltville blog. In a nutshell, you cut strips, squares, bricks, and the larger pieces so they are ready to get pulled for your next project. All precut and ready for the pattern!

Here's my pile from the table and a small part from the big bin cut and organized. 

A means of storing them is still needed but I am happy to have begun the process! This is a big undertaking but once I'm caught up, it will be easy to continue the prep cuts on future scraps. 

I think a small chunk of time, like 15 minutes, each day will really make a dent that will encourage me to finish. This is a time consuming process. You can't cut stacks of fabric when trimming out scraps. But the end result is reward of its own. 

Do you organize your scraps? What do you do with them?

Wednesday, October 16, 2013

Auditions for Borders

A make or break time for your project. Picking out the fabric for a border. Time to do some serious auditioning!

I thought this sand color matched, but it's tone was too light. And it looked like sand, which would have been awesome by the shore line of the water, but not around the entire quilt.

Black can be an interesting choice. A nice dark neutral to keep your eyes on the center panel. It was too mature. Close, but I wanted to look for something else.

This mottled blue was better. It gave the dark border that I wanted and still kept it in the baby boy blanket realm.

Yes, this is the right choice! Tomorrow, I'll sew it all on!

Many thanks to all the wonderful colors that tried out for the role of "border" tonight. Perhaps I'll cast you in another audition soon!

Monday, October 14, 2013

Apple Core Sunset Sailboat

The main panel of the top is coming together quite nicely. The strips of land, sea, and sky were sewn together. Now, it's appliqué time!

Little stitches bring the boat onto the waters and the sails up into the sky. This fabric looks like it has rigging through it!

The overall effect is so pretty. I can't wait to see it with the quilting on it!

Monday, October 7, 2013

Coat Lining, Buttonholes, and a Surprise

I had someone ask me if I could set the lining of the back panel into a winter coat. The old one was wearing out. I can do that!

Linings are made of slippery, fraying fabrics. You know what that means? I got to use Sergio Fabrico! He is perfect for this sort of job!


The serged edges will keep everything nice and neat. And a piece of leftover fabric was a nice size for a matching scarf. 

I just envisioned that swatch as a useful accessory. That is an unexpected bonus to my customer. Can't wait to give it to her!

She also gave me a second request for 12 buttonholes across the top of a curtain panel. I can do that! 

So I overlapped the to edge, measured out where the holes needed to go and got the buttonhole attachment on Lacy. (That's my new machine's name, short for Legacy)

I have to admit, my new sewing machine was flawless at stitching these out. Very happy with the results. The most frightening part was cutting the slits in between the stitches! 

The right tools bring forth good results. What is your favorite tool in your sewing room?

Friday, September 27, 2013

Wrap Up - September 27 '13

Hello and welcome from ThistleFire! So glad you decided to stop by. I'm linked with Leah's site, as usual. I would love to hear your thoughts about my week in fabric.

BKF Throw - This hot mess is finally looking like a quilt! Next, I will add the back, quilt it, and add a dark blue binding binding! I was so excited to find the border fabric. It was exactly what I wanted.


FMQ - Sometimes playing around with practice pieces can develop into something useful. That was the case with my FMQ'ing. I thought I'd play around with having the fabric tell me what it was that it wanted FMQ'd onto it. My material was wild! It has fish on it... and crazy patterns. So I let the FMQ be crazy!


Now the practice panels are eyeglass cases! They will be on my craft show table on October 5th.

OPP - The biggest project that was worked on this week was the challenge quilt. It was coming together nicely and the longarm quilting progressed very nicely. After finishing up the edges, I was able to hand it back over to the owner today. She was absolutely delighted with the results.

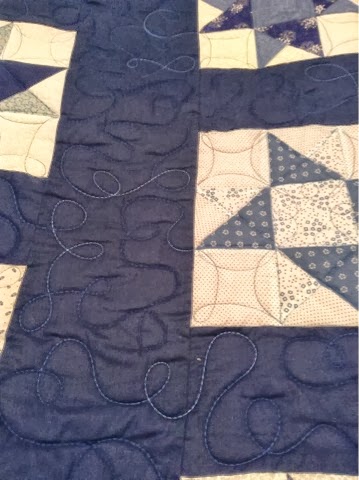
The dark blue areas had the big loopy line meandering pattern in a variegated thread.

The star blocks all had outlining in the star and loopy diamonds in the corners.

So, that's about it. I think that's a pretty good week! What's under your needle?

Tuesday, September 17, 2013

Challenge - Quilt Back Assembly

So the quilt top of the challenge is done. Now it needs a back!

I had a few star blocks left over from the top so it made sense to set them in the corners of the back. 

Just like for the top, I had just enough rose and cranberry fabric to make the back. Here's me and my puppy looking over the layout on half of the top.

After a bunch of cutting and seaming, I was pleased to have this for the back. The stars are set near to where the quilt edges will sit.

I know it looks huge but it needs to be bigger than the top so it can be loaded on the long arm for quilting. That part is the next step! Stop by again to see that get done!

Thursday, August 8, 2013

Winding Ways Block

Craftsy has inspired me again. Here is another example of what you get from the Playing With Curves class by Anne Petersen - Winding Ways block. 

I had this fabric in my stash for a small blanket or throw. 

Isn't it a great combination? Turquoise and brown looks so great together!

The Winding Ways pattern was offered in Anne's class and I really liked the way it looked. This fabric was my top choice. 

There are three pieces needed in each block. You alternate where to place the lights and darks.
They remind me of a slice of pie, a "T", and a Star Trek communicator badge. 

But when you place them down as the pattern instructs, you get something that looks like this. 
These aren't sewn together yet but you can already start to see circles forming within the bigger design. I love that effect!

Here it is with almost all of the pieces used. It's a real eye-catcher!

At this point, I have cut enough for 18 blocks. I think I have enough fabric to make 24-25 and that would make a decent sized lap quilt. Or it could make a very nice tablecloth. Or I could leave it just like this. Oh the possibilities!

Have you made the Winding Ways block? Learn more at Craftsy if you need the pattern and lessons on how to make this block. I hope you give it a try!


Wednesday, August 7, 2013

Curvy Placemats

This placemat project was the first example in Craftsy's "Playing With Curves" taught by Anne Petersen. I'm very pleased with the results. The FMQ in the solid areas was part of a design idea from "Machine Quilting with Templates: Creating Design Perfection" taught by Kimmy Brunner. Combining the two lessons made it extra fun! And to top it off, I'm linking up with Leah Day's FMQ Friday!

They are interesting to look at. And they say SUMMER!!! Where's my ice cream?


The back shows the FMQ-ing a little bit better.


The next project I will do is Winding Ways. Very excited about that one!

Check out Craftsy and start picking out patterns and video lessons to expand your skills. Tell them PamelynsPostings sent you!

Friday, August 2, 2013

FMQ and other fun stuff!


I've been a follower of the Free Motion Quilting Project with Leah Day for over a year and a half now. Her videos have taught me so much about FMQ and even if I don't do every project she offers, the ideas are ready to come in handy other times.

I also have become quite pleased with Craftsy and the wonderful things they have to offer. The last video series I began watching was about Curve Sewing by Ann Peterson. She is a fabulous teacher!

So, what did I free motion quilt this week? I am working on a set of summery, fun placemats that put both those skills to use.
 
The FMQ is in the flowered panels - all outlined echo filler, leaving the flowers unstitched.
 
It even looks cute on the back!
 
 
The latest four rows for Blue Kaleidoscope Flowers has been set aside for now. I have other things I have to finish first. It's great to have this project in the wings, waiting for me when I am ready to plug away at it again. 


Recently, I saw a gorgeous photo of a sunrise over a green field. I thought it may be pretty to piece it out in the apple core cuts. These babies are going along with me in long car rides and I'll hand stitch them when I am away from Thistlefire (my sewing room).


I managed to squeak out a couple more of the scrap blocks. It's great to save fabric scraps from going into the trash!


I don't know if you have the same Joann's sales I do but the Singer Dress Form was my big score yesterday with 60% off the regular price! Now I can fit homemade things for myself better. My dog couldn't stop barking at it for a while but I had her on my lap as I made the measurement adjustments and she learned it wasn't as ominous as it first appeared to her.


So that's what I was up to this week. How about you? Share the links to your blog posts here or share your pics at my Facebook page! Have a creative day!


Friday, July 19, 2013

The Scrap Pile

I did some paper piecing tonite. The blue flowers are growing in number!
 
Paper piecing can make a lot of scraps and waste a lot of thread. What can you do with those scraps that pile up but are too big to throw out? Make scrap blocks! 

In between each paper piece line, pull the pattern ahead just enough so you can slip a couple of scraps under the needle. Then sew the scrap pieces together. This will save thread and give you more results when you turn off the machine for the night! And it's fun to dig through the scraps to see what can be saved from the trash! 

As you trim up the edges of your paper pieced lines, set your scraps together according to length and shape. I had short, medium, long, and triangular piles. Then you can start grabbing them to make scrappy "crazy" blocks.

Tuesday, July 16, 2013

Dilemma and Solution

When you're faced with a dilemma, find the solution! Even if you have to do it yourself.

If you'd like to see a video about everything in this post, please visit my Facebook page, Pamelyn's Postings.

Sunday, April 14, 2013

Countdown to the Craft Fair

May 4 & 5 will be here before you know it and I will be ready for the show!

I was thinking about the On-The-Go Wallets that I have going to the Craft Fair, which brought on this idea. Just like us, our kids are on the go too! Here is a set of a blanket with a matching burp cloth to keep your little one warm and clean while you are out. The blankets are all backed with flannel and the burp cloths are embellished diapers, nice and absorbent yet stylish. These blanket sets will be priced at $32 at the show.

Which is your favorite?
Cogs!