Showing posts with label mystery. Show all posts

Sunday, February 5, 2017

En Provence - Completed!

Completed quilt top day! What a great feeling! Instructions for this En Provence can be found at this blog


I think of all the quilts I've made, this is one of my favorites! Thanks, Bonnie Hunter, for a gorgeous pattern! 

#enprovence #bonniehunter #mysteryquilt


Monday, January 9, 2017

En Provence - Clues to the block reveal

Happy New Year, everyone! Here it is... The big reveal! Are you playing along? Instructions for this En Provence mystery clue can be found at this blog. See everyone's progress at this link.

I was getting behind on the clues as the holiday hit. Because I was very busy making fabulous, "proper British Christmas bakes" for family parties. I am a huge fan of Mary Berry and Paul Hollywood. Their recipes are terrific!

Back to the quilt........
It's amazing to me to see a box full of this


Turn into a block like this!

Next month, the full quilt will be done! I can't wait to see it!

Monday, December 19, 2016

En Provence - Clue 4

Things are moving right along with En Provence! Can you believe we've been at this for almost a month? If you want the instructions for this clue, go to this post for it! See what everyone else is doing at this post.

It was down right cold and snowy this past weekend where I live. The perfect time to stay inside and finish addressing our Christmas cards and getting some wrapping done.


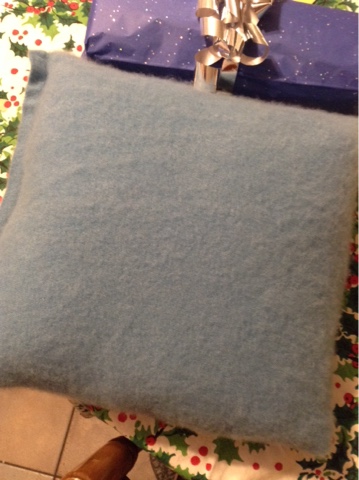
I made another Cashmere Covered Pillow for a good friend. I still have to do one for me!

My favorite Featherweight got set up on the footstool so I could get going on Clue 4!

It's a good start! My box of mystery clues is pretty full! 

Can't wait to see it come together!

Monday, December 12, 2016

En Provence - Clue 3

Onwards to part three if this year's mystery quilt, En Provence! If you want the instructions for this pattern, go to this post for it! See what everyone else is doing at this post.

After my winter cold ran its course last week, I started feeling noticeably better on Thursday and managed to get clue two finished on time! This weekend was the kickoff of all things Christmas at my house. My sisters and I went to a breakfast and show given in the traditions of France. How appropriate! Joyeux noel, tout le monde!

I made some Cashmere Covered Pillows as gifts. I got my decorations out, played the Christmas Songs to the Burning Yule Log video, and revamped the house into rooms full of tinsel, lights, and holiday-print fabric. The chicken was roasted, the lists are made and the snow started to fall. 'Tis the season!

Back on track.... This week - Purple four patches! Think lavender fields. 

I grabbed a bunch of fabrics for my purples and started cutting strips from the smallest pieces in the pile and worked up into the larger pieces. I figured I need to use the scraps instead of making more scraps!

Monday, December 5, 2016

En Provence, Clue 2

The first week of Bonnie Hunter's mystery quilt is done and week two is underway. How'd you do? Are you sewing or enjoying the project through the links?

Want to join in? It's not too late! Go to quiltville.blogspot.com and select the En Provence tab to find all you need to know. Here's the direct link for clue 2  and here's where you can see what other quilters are making!

A quick recap- Last week, we made our pile of four patches!

Sunday, November 27, 2016

En Provence - Clue 1

It's that time of year again. Bonnie Hunter's mystery quilt clues have begun! Thank you, Bonnie, for your generosity! Each of my posts can be found by my purple grin!

When I saw the luscious color palette, all of which I had in my stash, I figured I needed to participate. 

Want to join in? Go to quiltville.blogspot.com and select the En Provence tab to find all you need to know. Here's the direct link for clue 1 and the post to see everyone's progress!

When I saw this fabric, which I see as a neural, I thought it would add an interesting look to clue 1.

Monday, December 28, 2015

Allietare Mystery - Clue 5

Onward with the mystery! I'm linked up for this week's clue. I hope you're a part of the fun!

First things first! Let's measure up for the proper 1/4" seam allowance!

Thursday, December 24, 2015

Allietare Mystery - Clue 4

Moving right along with the Allietare mystery at quiltville.com - I'm linked up here with my progress. Thanks for stopping by and for leaving your kind comments.

I got into the cutting right away. 

Thursday, February 5, 2015

Dazzle Burst - Clue 6, The Final Reveal Video

Here is the video for this clue! Check out my post for the write up and photos.


Thank you for joining in on my mystery project! I'd love to hear your comments or see links to your post about what you made or share your pics on my Facebook page.

'Til next time!

Dazzle Burst - Clue 6, The Final Reveal

This is the clue we've been working towards. I made a video post for this clue so check it out if you want a visual!

It's the reveal! Aren't you excited? I am!

But first things first. There's a few steps to do before the top is together.

Last week, we made a pile if these blocks. Do you know the name of this block? 
It's called Fox and Geese! And we have 42 of them ready for quilt-top action. 

Take two of them and set them up like this. Take the right block and set it on the left one, right sides together of course!

Line up the seams in the center of all the edges. You can pop a pin at those points if you want help holding them in place. 

We will sew that center seam. Starting at the dark blue triangles...

...down the side to the light blue squares. While I sewed this seam, I would stop and made sure the two yellow points were lined up to each other as I approached them, adjusting them if they were not matched up. 

Sew all the pairs of the blocks together until you have 21 sets that look like this. 
That center seam will be bulky where the triangles meet. Press it open to minimize the lumps. 

This is where the magic starts happening! Take two sets and set them up like this! Can you see the burst effect?

Now place the sets right sides together and start at the dark blue triangles...

...and sew down to the other dark blue triangles. Just as before, stop and line up the places where points and seams need to meet. There are 5 to line up this time!

Open it up and look at the beautiful light colored star dazzle bursting inside the dark colored star!
Just like before, press the center seam open. I know it's fiddely to do but it'll be worth it later!

Now keep making these big blocks until you have nine and there will be three of the original pairs left. Sew them together in a row as a final row. 

When you're done, you'll have a top that looks like this-


See how the stars interlock with each other? It's dazzling! 

You can choose to add borders or not. It's up to you. Without borders, your quilt will measure out at 48" X 56", which is a great size for a sofa throw or a crib. Add a 2" and a 5" border around the entire top and you'll have a quilt big enough for a twin sized bed! Or keep making more burst blocks and adding them to the side and top until it's as big as you want it to be! 

This is totally customizable to your liking, just do the math and divide your totals by 16, which is the size of the completed burst block. So if you want your top to be 80" X 88" for a full sized bed, you need 5 burst blocks across (80 divided by 16) and 5 long plus a row of half of the burst block (88 divided by 16) and you're there! We made 9 burst blocks and a row with 1/2 blocks. For a full sized bed, you need 25 burst blocks and a row with 1/2 blocks. So you would need to triple the fabric requirements for that size. 

I hope you enjoyed this mystery project! Please leave a comment and share what you've made. You can leave a link to your blog or photo site or upload one to Pamelyn's Postings, my Facebook page! Thank you for participating and see you next time!

Thursday, January 29, 2015

Dazzle Burst - Clue 5

This week is similar to last week's clue. You're practiced up taking squares and sewing them in a specific way. Let's do that some more!

Take all the squares we have done to now. Grab one of each and line them up this way -

Sew the center seams. You will have 84 blocks when they are all matched and sewn up. 

Now take two blocks and set them up like this -

Notice how all the yellow triangles are pointing in the same direction. That's important so make sure the look like that before you sew them!

Sew the seam across the middle. You will end up with 42 blocks that look like this -

That's all we will do this week. It will give a chance for some catch up sewing. I know I need it!

Leave a comment and let me know how you're doing. Be encouraged; we're almost done! Have a tremendous weekend!

Thursday, January 22, 2015

Dazzle Burst - Clue 4 Video


https://www.youtube.com/watch?v=xvokXa7rt4M

Dazzle Burst - Clue 4

Guess what? We don't have to do any cutting this week! We're taking what we have and working with that!

But first, let's review.

In the Introduction, we discussed colors and shades that would work for our Mystery project.

In Clue 1, we made 168 2-1/2" squares with our medium shade of the cool color.

In Clue 2, we made 84 4-1/2" half-square triangles with our dark shades of both warm and cool colors.

In Clue 3, we made 168 2-1/2" half-square triangles in the medium shades of both the warm and cool colors.

That is where we left off last. How are you doing with the clues? Are you keeping up? Good! Let's move onto Clue 4!

This week, we are going to only work with the 2-1/2" pieces. Take all of the squares and half-square triangles and get them set up like this. Put the right square on top of the left half-square triangle (right sides together) for sewing along the right edge of the stacked pieces.

Sew up the pairs; you can chain piece them until they are all done. When you open them, they will look like this.

Press the seams towards the darker color. In my case, it is towards the blue square.

Now take all of your sets and match them up like this. We will be sewing that center seam closed.

I put the upper set on top of the lower set. The top edge is the one that will need to be sewn.

You want to make sure the center seams are matched up so the center points come out next to each other when they get sewn. When you put the seams next to each other, you can feel them butt up against each other. If you fold the top set back, you will be able to tell if they are lined up or not. These look perfect! You can pop a pin at that seam if you want.

When I take my sets to the machine, I will sew them all the same way - from this yellow point...

...all the way down to the bottom of the blue square.

Here is what the blocks will look like when they are sewn. Pretty! Almost like a butterfly!

When they are pressed, the best way to stop the bulk in the center is to "spin" the seams around so it looks like this.

I noticed that my edges were a little wavy so I trimmed the excess off. These blocks are going to finish at 4-1/2" square so I lined up the center vertical seam on the 2-1/4" line on my ruler for each side that was trimmed.

There it is! All done! Keep sewing these until all of your 2-1/2" pieces are all gone!

You should have 84 of these blocks when you are done!

If you want a visual of this process, I made a video for this clue. You can find it in the Mystery Projects tab on the top of this page!

I hope that you are inspired enough to keep going with the mystery! Please give me your comments below, links to your blog, or pictures on my Facebook page, Pamelyn's Postings, anytime! The mystery will be available for a long time so start it up anytime you want!

Wednesday, January 14, 2015

Dazzle Burst - Clue 3

Here we are with the next piece of the mystery puzzle! How are you doing? Are you keeping up? If you are, that's great! If not, just keep plugging along at your own pace; the clues will be here for you! Everyone can pat themselves on the back for their progress so far, and grab your tools for this clue!

Today, you need to use the lighter shades of the cold and warm color. 
Here's mine-

But what are we making? 

Remember in a Clue 1 where we cut 168 2-1/2" squares and in Clue 2 we got real good at making half-square triangles? This clue is combing both these steps! We're going to make 168 2-1/2" half-square triangles! 

Start by cutting 2-1/2" strips if you're using the EZ Angle tool. 

Place right sides together and cut the long edge. 

Flip it around and cut the other side. Keep flipping and cutting until you have 168 sets. 

Stitch up the long edge. You can chain piece all of them at once. See the "bonus post" I put up for more input on that. 

Press the block open so the seams are under the darker color. In mine, it was towards the blue. 

When you have 168 2-1/2" half-square triangle blocks and can call this clue done! 

Mine needs a little trimming. Only 167 to go!


If you are not using the EZ Angle tool (check out Clue 2 for the visuals)
1) cut your strips 2-7/8" and cut again so you have 2-7/8" squares.
2) draw your line down the center from point to point. 
3) draw sew lines 1/4" around the center line.
4) sew on the sew lines. 
5) cut the line inbetween the sewn lines. 
6) press the seams towards the darker color
7) make 168!


Have fun making these blocks! Share your progress by leaving a comment here or on my Facebook page. 

Wednesday, January 7, 2015

Dazzle Burst - Clue 2

We're on our way! Let's get into clue 2...........

In Clue 1, we went over how to take our fabric and make strips out of it. We'll do that again but this time we won't be cutting squares. We're cutting triangles! We're going to make 84 half-square triangle blocks with the dark colors. Get out your two dark colors, your cutting mat, your rotary cutter, your cutting guide (EZ Angle or straight edge), and your sewing machine!

Let's just start out to say that there are many ways to get to our final block. I can think of 5 ways to make half-square triangle blocks, and I'm sure there are even more ways to make them than that. I will offer two ways of making them in this clue. You can choose which way you want to make them, how I do them or however you like doing them. We want to get the end result of 84 4-1/2" half-square triangle blocks!

This method will show you how to use the EZ Angle cutting guide. Don't have one? Get it! It's a great tool! Can't get one? I offer the instructions with a straight edge cutting guide as well. Just go down to that section and follow those instructions. Ready? Here we go!

I cut my strips at 4-1/2", from both the warm and cold dark colors. I figured out that I needed six strips cut from edge to edge in order to have enough to make the blocks. 


Line up the strips with right sides together and set them on the cutting mat. Put the EZ Angle cutting guide so the darkened tip is lined up on one edge and the 4-1/2" line is lined up on the opposite edge.


Make the cut on the hypotenuse side of the triangle! (remember thinking you would never need to remember stuff like that in geometry class? me too!)
You will flip the EZ Angle around so the 4-1/2" line is on the opposite edge. The hypotenuse is lined up along that cut edge and you will make the next cut along the leg side of the guide. Now your strip is squared off again. Keep swapping the guide and cutting triangles until you run out of fabric!

My strips produced 16 sets. In order to get 84, I need just over 5 strip sets.

Cutting the colors right sides together makes a perfectly matched pair after they are cut. Joy!


Place the hypotenuse side under the needle and stitch the 1/4" seam along the entire edge. Be careful to not tug on it or it will stretch. Chain sew triangle set after triangle set until they are all sewn together.


Take those blocks and press them towards the dark color or press the seams open. When you are done, you will have a block that looks like this. 
It's 4-1/2" square and will finish in the quilt at 4".

Have I convinced you to get the EZ Angle cutting guide? No?
Well then, here's how to make the half-square triangles without the EZ Angle cutting guide. 

Cut your warm and cold dark fabrics into 4-7/8" strips.


Now do a second cut at the same size so you have a 4-7/8" square.


Turn the square so it is in a diamond layout and place a straight edge down the center. 


Draw a line from point to point. I used a pen so you could see the line well but I usually use a fabric pencil. These lines will be on the underside of the block so choose the marking tool you like most!


You will need to sew 1/4" seams on each side of that line. If you want to draw those lines in too, feel free! It will take the guess work out of where to sew. The Fons & Porter 1/4" Seam Marker tool makes this step a pleasure. Set the guide down and draw the lines on either side of the tool. That's it!


Get the square under the needle and sew along both sides of the center line. When you get to one end of the line, lift the foot and needle, gently pull the fabric away from the foot a little, turn it around so you can sew down the second side. This technique will make two half-square triangle blocks.


After the squares are all sewn, you cut the two blocks apart on that first line you drew, point to point down the center of the square.


Press the seams to the dark fabric or open and admire your beautiful handiwork!


So there you are! Clue 2 is out there! Need more of a visual? Check out my Clue 2 video!

I hope you are enjoying the process. Next week we will be doing stuff with the lighter colors so get this one done! Til next time, create away!